So you want to grow your own medicine? Welcome to the club, and good decision! If you’re going to make yourself some oil it’s best to become self-sufficient with the source material: cannabis. It doesn’t matter what it’s for – pain management, buffering yourself against the ravages of chemotherapy or fighting cancer itself, or helping manage stress, anxiety or PTSD without prescription medication – the best thing to do is GIY: grow it yourself. You’ll know exactly what did and didn’t go into the plants, you’ll save yourself a fortune, and if you live somewhere it’s not yet legal you won’t have to do any iffy deals.
If you asked a gardener they’ll tell you planting is for Springtime, and if you missed it this year you’ll have to wait for the next one. But that’s okay, we’re not going to rely on the sun and seasons. We need to raise a sustainable, repeatable crop a few times a year to keep the medicine coming through Summer, Fall, Winter and Spring, so the answer is a grow tent and artificial lighting.
A grow tent is simply a rectangular frame and cover, silvered on the inside and with a zip-up door and some vents. Stick a couple of plants in there along with lights, and you’re up and running. Easy, huh? Well, to be honest it is a BIT more complicated than that, but it’s not rocket science. I’ll walk you through what you need to have a grow tent system that’s reliable and productive.
A grow tent:

Before you do anything else, work out where you’ll keep your grow tent. This will show you what size tent you can get. If you have the space, get one that’s around 3ft/1m or so square and 6ft/2m high. If that’s a bit big, a narrower tent works. Remember you’ll have lights hanging inside, so anything much shorter than 6ft could feel cramped once your plants get going.
(You COULD use an old wardrobe instead of a commercial tent. But unless you have one spare and can get reflective liner material cheap it’ll cost you as much as a proper tent. I’ve considered this and ended up not doing it.)
Some electrics:
You’ll need power sockets near your tent. The overall power draw won’t be much more than 200W – around as much as three traditional lightbulbs – so you can run an extension lead to it if you need to.
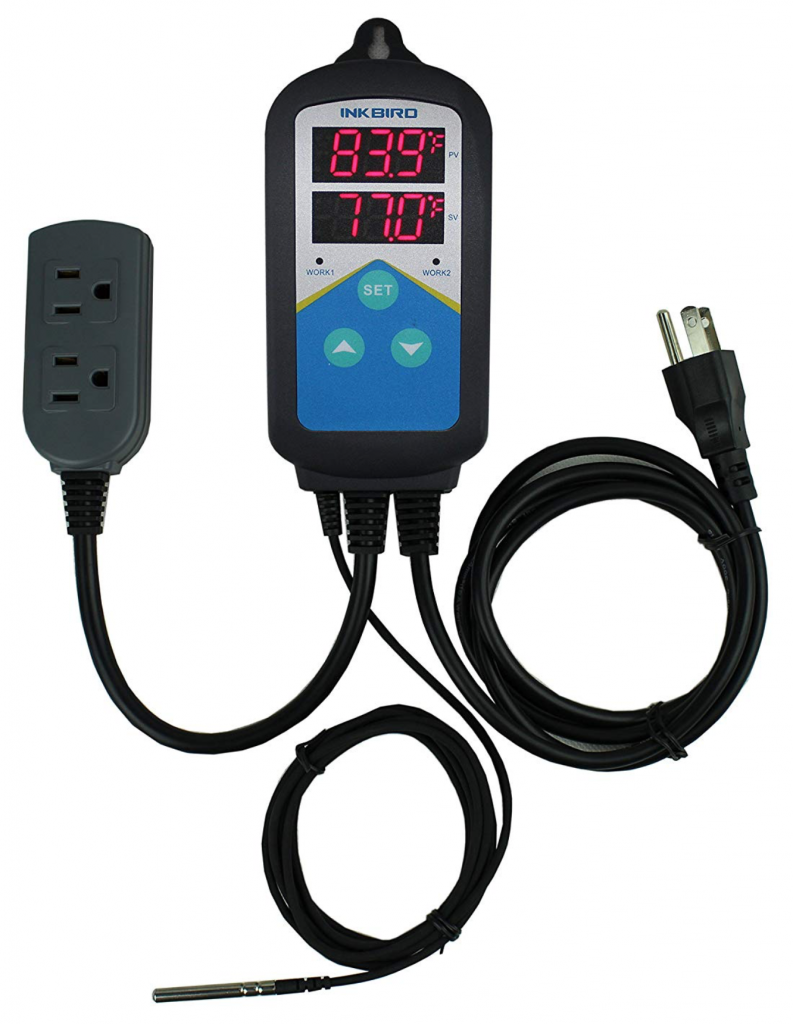
Stick a cheap 24-hour timer into one socket and hang an extension lead from it. This will be for the grow lights so they’ll be turned on and off automatically, simulating day and night. Put a second timer into another socket and have it turn a fan on and off at short regular intervals. This will be to pull fresh air into the tent. Finally, in a third socket, put a thermostat plug with a sensor on a wire, run the sensor into the tent, and set it to run an extractor fan at the top of the tent when the heat reaches around 80°F/27°C. You may be fine without one of these, but it will make sure you don’t accidentally kill your plants by over-heating them.

You should plan to have all your extension leads sit outside the tent, with the various cables for anything inside run through a vent hole and with the vent sleeve tight around them to keep out external light.
If you want to know exactly how much power the final setup uses, get yourself a plug-in wattmeter and have everything run through this. You’ll be able to see exactly how many watts are being used, and you’ll be pleasantly surprised. I find that a tent with over 800W of LED lighting and a couple of duct fans uses not much more than 200W of power!
Ventilation:
A couple of four-inch (100mm) or six-inch (150mm) inline duct fans and a length of flexible ducting will sort out your air exchange; one for air in at the base, one for air out at the top. The top fan plugs into the thermostat socket, the other plugs into one of the timer sockets. If you’re worried about the smell when your plants start flowering then add a carbon filter to the extraction fan setup. These do really well to remove odour. If you buy things separately make sure they’re all for the same diameter of ducting.

My setup has the carbon filter outside the tent so the extraction fan blows air out through it. Most people have it hanging inside the tent, but this took up too much space. I wrapped gauze around the duct pipe inlet inside the tent to catch airborne particles and keep the carbon filter running for longer.
Grow lighting:
LED lighting is fine; it’s what I use for everything. Ignore old-school purists and don’t bother with more traditional non-LED alternatives; they are more expensive to buy and run, more fiddly to set up, and they generate more heat.
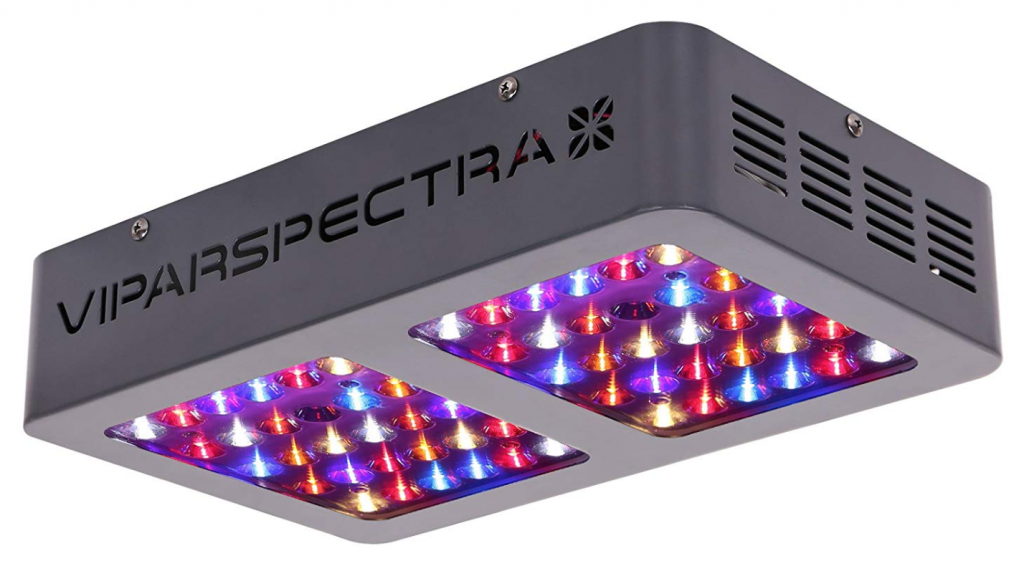
An LED grow light has red and blue LEDs but no green, as plants don’t make use of that part of the spectrum. They may also have a few UV and infrared LEDs. You’ll need about 600 watts of effective output, so ignore all the low-wattage toys you’ll see online. Get two 300W LED lighting panels so if one ever fails you’ll have time to replace it without a panic. You can use three of these for even more light, but two will do the job. The purpleish light these make is a bit suspect so keep that in mind. Doors to the outside should be closed and windows covered when you open up your tent.
(600 watts of LED grow lighting doesn’t actually use 600 watts of power. It gives roughly the same amount of light as that much traditional lighting, but it uses – and costs – much less to run.)
Unfortunately there are many crap grow lights on offer. If something seems significantly cheaper than the rest for its claimed wattage level, it won’t really deliver anything like what it promises. I suggest making sure at least one of your lights is from one of the known names such as Mars Hydro, Vipar Spectra or similar.
Water:

If you have the space, a garden water butt is useful, and not just for convenience. Tap water in many States – in most Western countries for that matter – is treated with chloramine, so I fill up a water butt and add a small amount of water conditioner to break this down. My plants definitely appreciate the end result! You’ll need to fill up your water butt somehow. If you can capture rainwater do that and you won’t need to treat it, otherwise do what I do: use a garden hose and add a few drops of Seachem Prime each time.
Extras:
Fly paper. Yes, at some point you’ll be hit by pests. The most common unwelcome visitor is fungus gnats or blackfly, but if you have a strip or two of old-school sticky fly paper hanging down they’ll end up on these before they have a chance to take over. These are cheap, and one or two will last for a whole grow ‘season’. They won’t make you bullet proof but they really will help. They’re also annoyingly sticky, so don’t put them where they’ll get into your hair – this is the voice of bitter experience!
CO2. Plants breathe. During their daytime they take in carbon dioxide – CO2 – and breath out oxygen. Your fan setup should keep the air moving a bit at least and do some air exchange, but as they get bigger it helps to supplement this. You can buy bags of CO2-emitting chemicals or use a mushroom grow kit, which exhales CO2 as the spores colonize their grow medium. This helps the plants ‘breath easy’ – but they aren’t likely to actually ‘run out’ of CO2, especially if you open the tent every day to check on them. The biggest reason to use CO2 is that a decent concentration of this helps plants survive and even thrive when temperatures are higher than they should be. Consider it more important during hot Summer months.
Clip-on fan. When your plants are flowering there’s always a risk that the buds might go moldy, which ruins your crop. Putting a small fan inside, say clipped onto a tent pole near the top of your tent, will keep the air moving directly around the flower buds and make it harder for mold to get a foothold. This will also discourage pests such as spider mites, which can be REALLY hard to get rid of if they get a foothold.
Using a fan as soon as the plants are past the seedling stage will encourage stronger stem and branch growth, which in turn helps the plants grow bigger and stronger, so consider this one of the more important optional extras!
That’s about it for the hardware. Shop around to get good prices for everything, and think carefully about where the tent will face, how you rig up the ducting and where you run your cables. This is going to be a long-term project, so take your time. Once you’ve done this the next step is getting a few seeds going. That’s covered in the Growing Discreetly post.
Essentials:
- A grow tent
- Two 24-hour timer sockets
- A thermostat plug with sensor wire
- A couple of four-way extension leads
- Two inline duct fans, a carbon filter and some flexible ducting pipe
- Two 300W LED grow lights
Nice to have:
- Water butt
- Water conditioner to remove chloramine
- Wattmeter plug
- Fly paper
- Small clip on-style fan (or two)